Monday, November 5, 2012
This tutorial is of my own creation and any resemblance to any other tuts is purely coincidental. This tutorial is for personal use only, using it for monetary gain is against our TOU's
Supplies:
Gimp or program of choice
PTU kit Harvet Time from Sarah's Tags N Things
Tube of choice. I am using Pinuptoons. You must have a license to use these tubes. Purchase them at Creative Design Outlet
Template 163 from Punky Butts
Fonts- KG Eyes Wide Open & Pea Noodles Girlfriend
-Open template. Delete credits. Image>Scale Image 450x450 px. Image>Canvas Size 600x600 px and click center.
-Let's add papers to the template layers. Make the template layer active (see below). Right click template layer in layer box and choose alpha to selection. Open paper (see below). Right click paper layer in layer box and choose add alpha channel. Select>Invert. Press delete on your keyboard. Select>None. Filters>Light & Shadow>Drop Shadow 2, 2, 5, black, 50. Delete the original template layer. Here are the template layers and which papers I used:
black circle- paper 2
right orange square- paper 7
left orange square- paper 6
large square- paper 3
right black square- paper 5
left black square- paper 5
left top black square- paper 4
right bottom black square- paper 4
-Open tube. Make the top layer. Layer>Scale Layer 70%. Place tube in center of tag. Repeat drop shadow.
-Open element 39 (grass). Move this layer below tube layer in layer box. Scale 50%. Place at bottom left of tag. Layer>Duplicate Layer. Layer>Layer To Image Size. Select the flip tool and click canvas to flip the duplicate grass.
Elements:
2
13
3
40 - flip
18
4 - Rotate -15
22
24
26
12
21
28
33
14
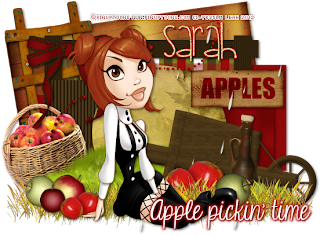
-Make the top layer active. Select the text tool. Font: KG Eyes Wide Open, Size: 50, Foreground color: white. Click canvas and type 'Apple pickin' time'. Place text at the bottom right of tag. Alpha To Selection. Select>Grow 2. Layer>New Layer. Move new layer below text layer. Change foreground to d211819. Select the bucket fill tool and fill selection. Select none. Filters>Blur>Gaussian Bluw on default. Make the text layer active and add a drop shadow of 2, 2, 2, black, 50.
-Add your name with the Pea Noodles Girlfriend font. Also add your copyright and you're done!
Labels:PTU tuts
Subscribe to:
Post Comments
(Atom)
Labels
12x12 Layout
A Taggers Scrap
Animated
Announcements
Art of Freya
Basic tuts
Blog Trains
CDO
Cluster Frame
CT tags
Extras
Forum Set
Freebies
FTU CU
FTU Kits
FTU tuts
Holiday
Jackie's Jewels
Kissing Kate
Masks
PTU Kits
PTU tuts
Quick Pages
Results
Results with Amys kits
Show Offs
Sweet Cravings Scraps
Tasha's Playground
Templates
Timeline Banners
Chit Chat
Blog Archive
-
▼
2012
(550)
-
▼
November
(39)
- Former PTU kit now FTU - Elf and Candy Cane
- PTU Tut- It's Christmas Time
- PTU Tut- Crazy For You
- Gimptastic Scraps CT results
- Former PTU kit now FTU - Ginger Christmas + Cluste...
- PTU tut- Midnight Kiss
- Final Day - Biggest Sale of the YEAR
- PTU tut- Magical
- Gimptastic Scraps CT results
- PTU Tut- Jingle Jangle
- PTU tut - Magic of Winter
- Biggest SALE of the year!!!!!!!!
- Turkey Day CT Tags and Snags!
- Gimptastic Scraps CT results
- CT Tags and Snags!
- PTU tut - Violet Winter
- PTU Tut- Snow Buddies
- Black Friday Weekend Sale
- Former PTU kit now FTU - Forest Keepers
- Gimptastic Scraps CT results
- FTU Creative Misfits Exclusive kits
- Freebie Cluster Frame
- FTU Winter Diva Collab
- Gimptastic Scraps CT results
- PTU Tut- Winter Forest
- PTU tut - Forever Friends
- PTU Tut- Dark Dreamer
- Former PTU kit now FTU - Skater
- Gimptastic Scraps CT results
- Gimptastic Scraps CT results
- Gimptastic Scraps CT results
- PTU Tut- Apple Pickin' Time
- Gimptastic Scraps CT results
- PTU Tut- Dressed To Kill
- Former PTU kit now FTU - Kindreds Swan
- PTU tut - The Glamorous Life
- PTU Tut- Hot Winter
- Gimptastic Scraps CT results
- Former PTU kit now FTU - Turkey Day Protest
-
▼
November
(39)


0 comments:
Post a Comment